
Pull case documents straight from your Dropbox into DiscoveryEZ. Once connected, OCR runs automatically and your files are ready for discovery review in seconds.
STEP 1
Log in to DiscoveryEZ
- Open https://ai.discoveryez.com/
- Enter your Email or username and password.
- Click Sign in.
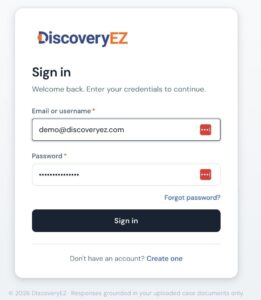
The DiscoveryEZ sign-in screen.
STEP 2
Open a case or start a new one
- On the dashboard, pick an existing case from Active Cases in the left sidebar.
- Or click the orange + New Case button to start a fresh review.
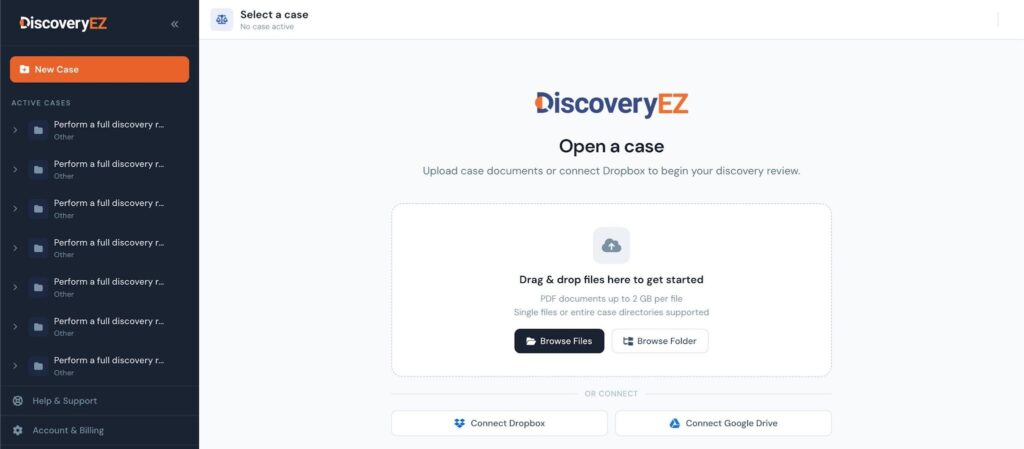
The Open a case dashboard — your launchpad for cloud imports.
STEP 3
Click “Connect Dropbox”
- On the case screen, scroll to the OR CONNECT section beneath the upload area.
- Click Connect Dropbox.
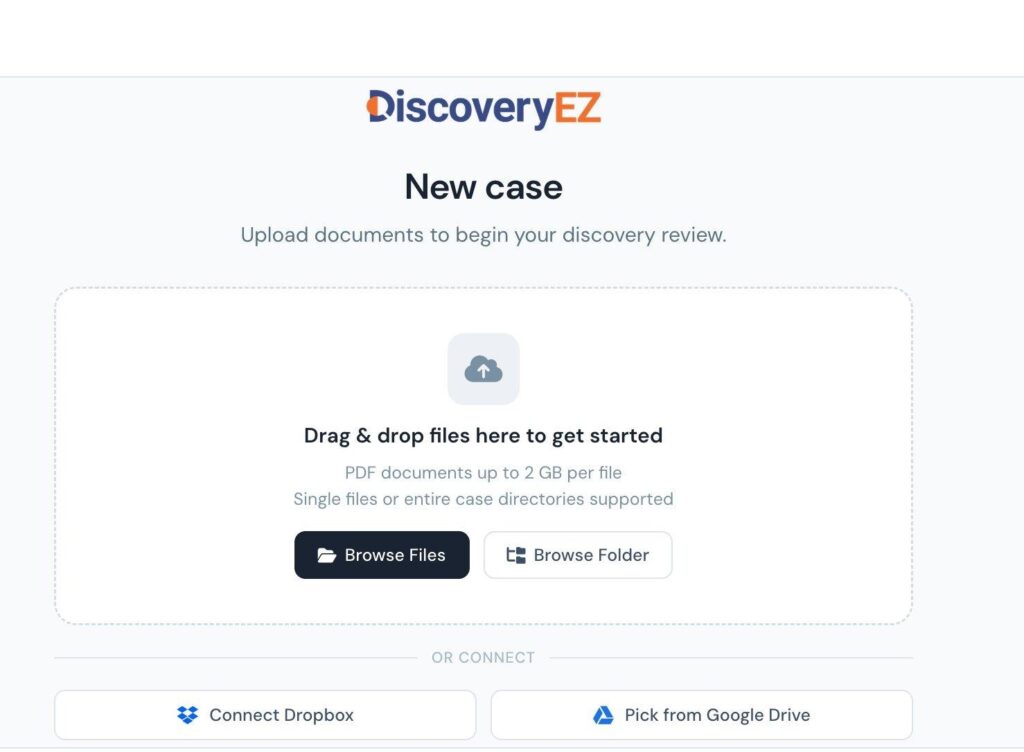
The Connect Dropbox button sits below the drag-and-drop area.
STEP 4
Continue to Dropbox to authorize
- A Link your Dropbox dialog appears.
- Click Continue to Dropbox.
- Dropbox may ask you to sign in and then approve access — this is a one-time step.
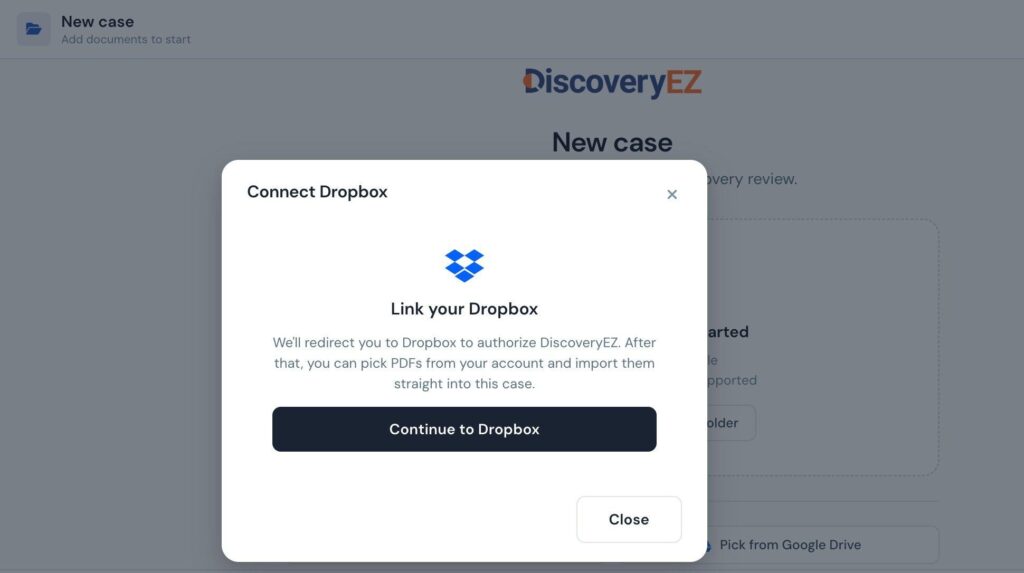
DiscoveryEZ only reads the PDFs you choose to import.
STEP 5
Browse your Dropbox folders
- Your connected Dropbox account is shown in the top-right.
- Click any folder to open it — for example, DiscoveryEZ Data Room.
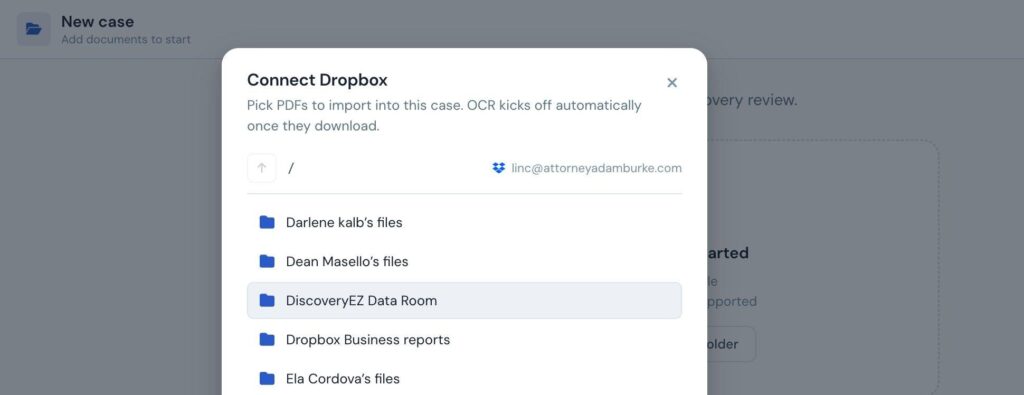
Navigate folders just like you would in the Dropbox web app.
STEP 6
Choose the PDFs you want to import
- Inside the folder, you see every PDF with its file size.
- Use the ↑ button in the breadcrumb to go back up a level.
- Tick the checkbox next to each file you want to import.
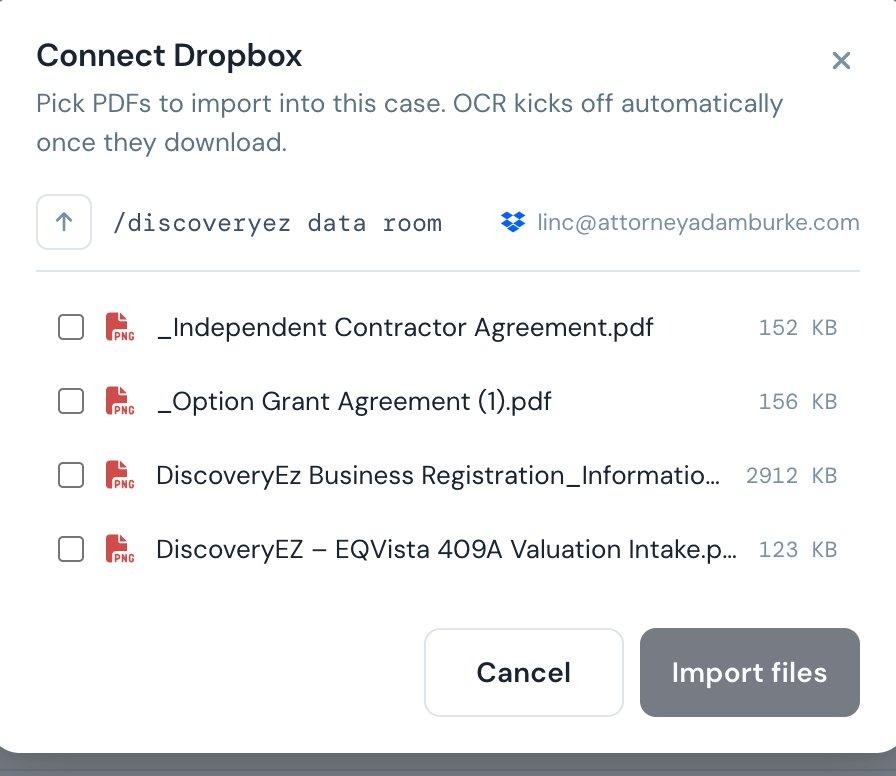
The Import files button stays grey until at least one file is selected.
STEP 7
Import your selection
- Once selected, the button updates to show the count — e.g. Import 1 file.
- Click it to bring the documents into your case.
- OCR runs automatically once files finish downloading.
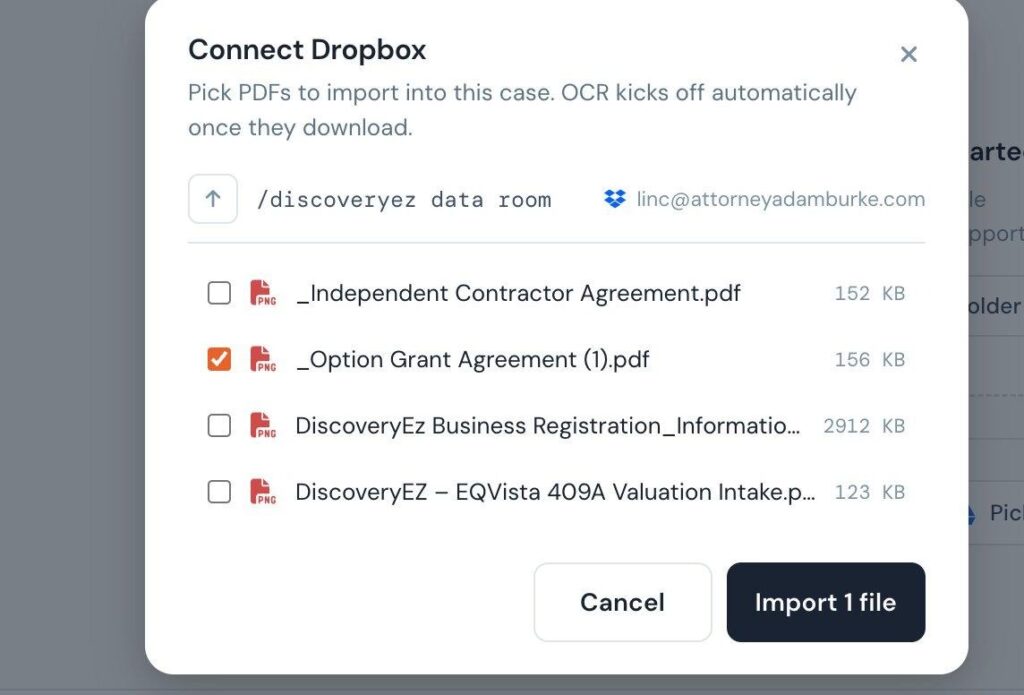
You can re-open the picker any time to add more files — no need to re-authorize.
✓ YOU’RE DONE!
Dropbox is connected, your files are imported, and DiscoveryEZ is ready to help you review them.