
Connect Google Drive to bring case files into DiscoveryEZ quickly, without the back-and-forth of manual uploads.
STEP 1
Open a new case and click Connect Google Drive
- Sign in to DiscoveryEZ at https://ai.discoveryez.com/.
- Click + New Case in the sidebar (or open an existing case).
- Scroll to the OR CONNECT section below the upload area.
- Click Connect Google Drive.
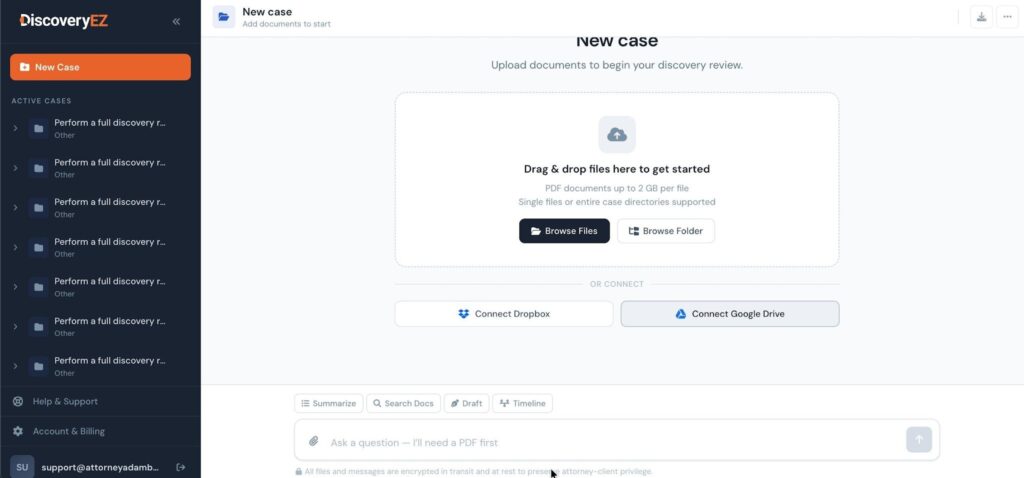
The Connect Google Drive button sits beside Connect Dropbox under OR CONNECT.
STEP 2
Choose your Google account
- A Sign in with Google window will open.
- Pick the Google account you want to connect, or click Use another account to add one.
- On the next screen, click Allow to give DiscoveryEZ permission to read your Drive files.
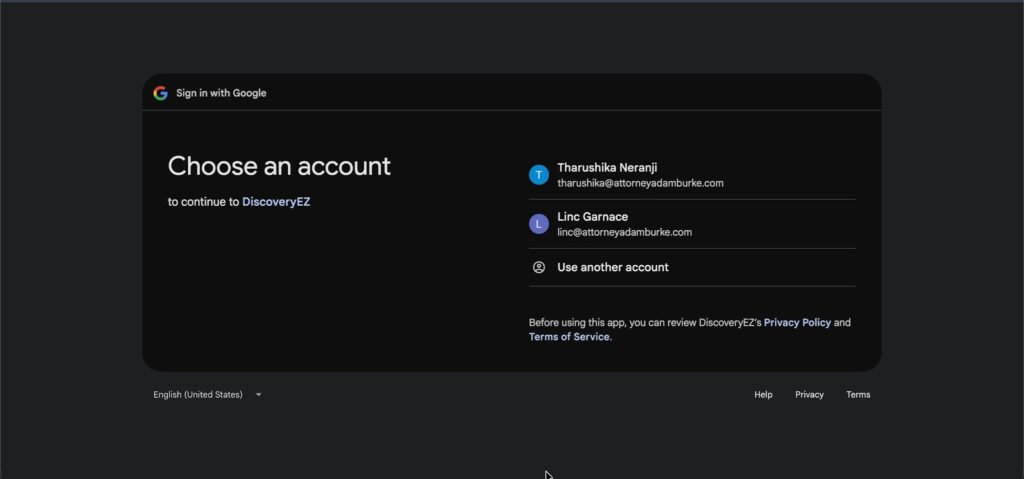
Choose the account that contains your case files.
Privacy note: DiscoveryEZ only requests read access to the files you select. It never modifies your Drive and never accesses files outside the case.
STEP 3
You’re connected
After authorizing, you’ll return to the New case screen. The button you clicked earlier now reads “Pick from Google Drive” — confirmation that the connection succeeded.
- Click Pick from Google Drive to open the file picker.
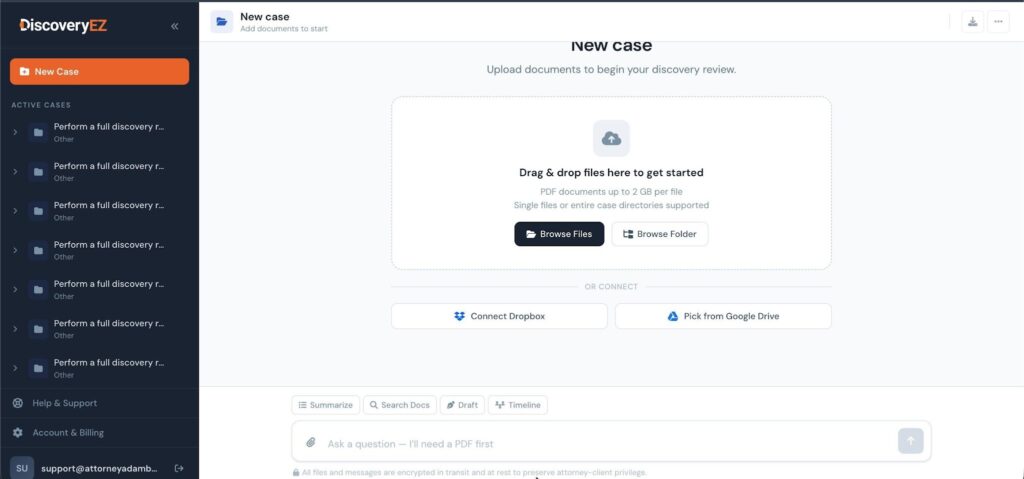
The button label changes once your Google account is linked.
STEP 4
Pick the PDFs you want to import
- The Pick PDFs to import dialog opens, showing your Drive folders and files.
- Browse folders, or use the search box at the top to find a specific file.
- Use the view toggles on the right to switch between list and alphabetical sort.
- Click the folder or files you want, then click the blue Select button at the bottom left to import them into your case.
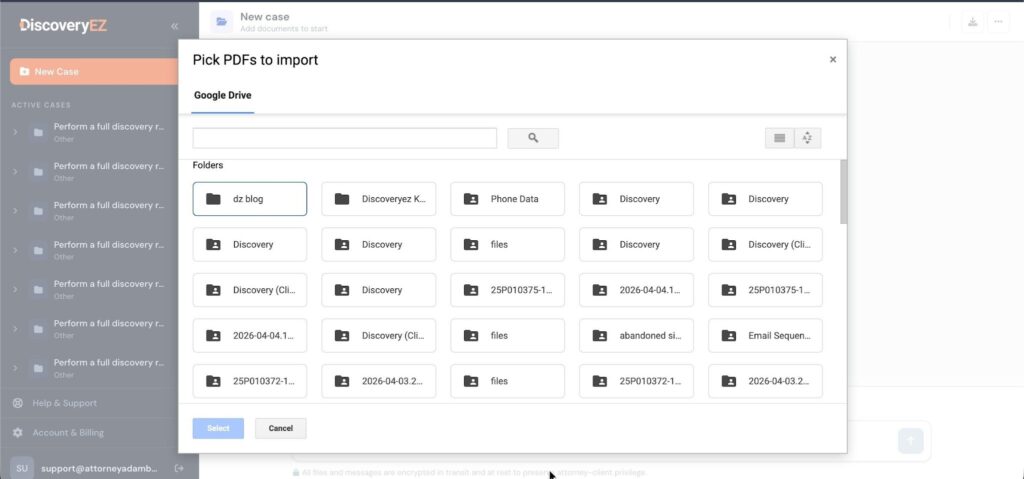
Pick a folder to import every PDF inside, or drill in to choose specific files.
Tip: Selecting a folder imports all the PDFs it contains — great for moving an entire case directory in one click. OCR runs automatically once files finish downloading.
✨ YOU’RE DONE!
Google Drive is connected. Reopen the picker any time — no need to re-authorize.